Arduino Sequential LED Blinking Project
This LED lighting project, which can be easily done by beginners using Arduino, is one of the first things that comes to mind when it comes to simple Arduino projects. In our blog post, you can find the necessary materials, connection diagram, and required software to make this project.
Required Materials
· 5 LEDs
· Male - Male Jumper Cable or 65-piece Male - Male Jumper Set
You can purchase all the necessary materials for Arduino Uno with Led Burning and extinguishing by clicking on the product names.
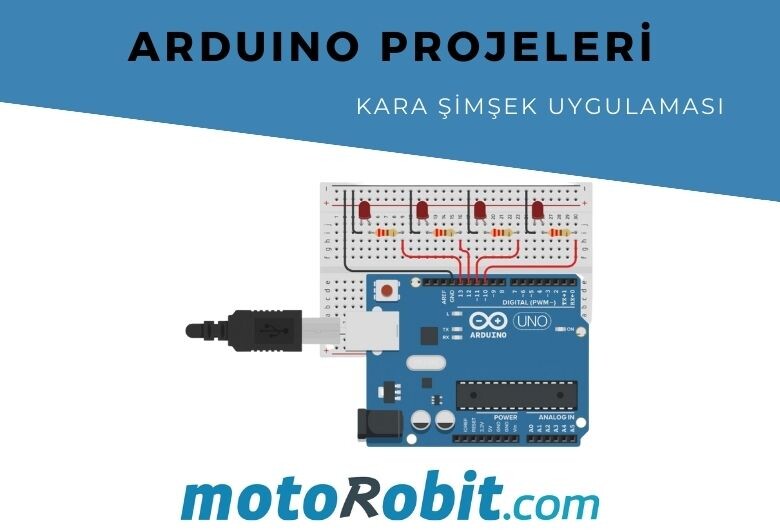
Project Connection Diagram
After making the necessary connections, you can upload the following code to your Arduino.
Project Codes
1 2 3 4 5 6 7 8 9 10 11 12 13 14 15 16 17 18 19 20 21 22 23 24 25 26 27 28 29 30 31 32 33 34 | // Sequentially blinking LEDs (Black Lightning) int aled = 3; // Define pin 3 as aled. int bled = 4; // Define pin 4 as bled. int cled = 5; // Define pin 5 as cled. int dled = 6; // Define pin 6 as dled. int eled = 7; // Define pin 7 as eled. void setup() { pinMode (aled, OUTPUT); // Define pin 8 as output. pinMode (bled, OUTPUT); // Define pin 9 as output. pinMode (cled, OUTPUT); // Define pin 10 as output. pinMode (dled, OUTPUT); // Define pin 11 as output. pinMode (eled, OUTPUT); // Define pin 12 as output. } void loop() { digitalWrite (aled, HIGH); // Turn on aled. delay (100); // Keep it on for 0.1s digitalWrite (aled, LOW); // Turn off aled. delay (100); // Keep it off for 0.1s digitalWrite (bled, HIGH); // Turn on bled. delay (100); // Keep it on for 0.1s digitalWrite (bled, LOW); // Turn off bled. delay (100); // Keep it off for 0.1s digitalWrite (cled, HIGH); // Turn on cled. delay (100); // Keep it on for 0.1s digitalWrite (cled, LOW); // Turn off cled. delay (100); // Keep it off for 0.1s digitalWrite (dled, HIGH); // Turn on dled. delay (100); // Keep it on for 0.1s digitalWrite (dled, LOW); // Turn off dled. delay (100); // Keep it off for 0.1s digitalWrite (eled, HIGH); // Turn on eled. delay (100); // Keep it on for 0.1s digitalWrite (eled, LOW); // Turn off eled. } |

Differences Between Li-ion and Li-Po Batteries: Which Battery is Suitable for Which Project?

MPU-9250: 9-Axis Acceleration Sensor - A Comprehensive Beginner's Guide

What is ULN2003 ?

What are Serial Converter Cards (RS232, RS485, TTL)

What is Peltier and What is its Working Principle?

.png)