Resistance Meter Making | Measuring Ohms with Arduino, Ohmmeter

Arduino resistance meter construction with you. It's quite easy to make your own ohmmeter using Arduino! Let's look at the necessary steps together.
What is a Resistance Meter
A resistance meter is a product used to measure the ohm values of resistors that we have but do not know their values. If you have resistors whose ohm values you don't know, you can learn the resistance value with this project.
Our circuit is quite simple. All you need is an Arduino, the resistor you want to measure, and another resistor with a known value. We will create a voltage divider with the known and unknown resistors and measure the voltage between them with Arduino. Then we will use a code to calculate the resistance from Ohm's Law.
First, connect the circuit as follows:
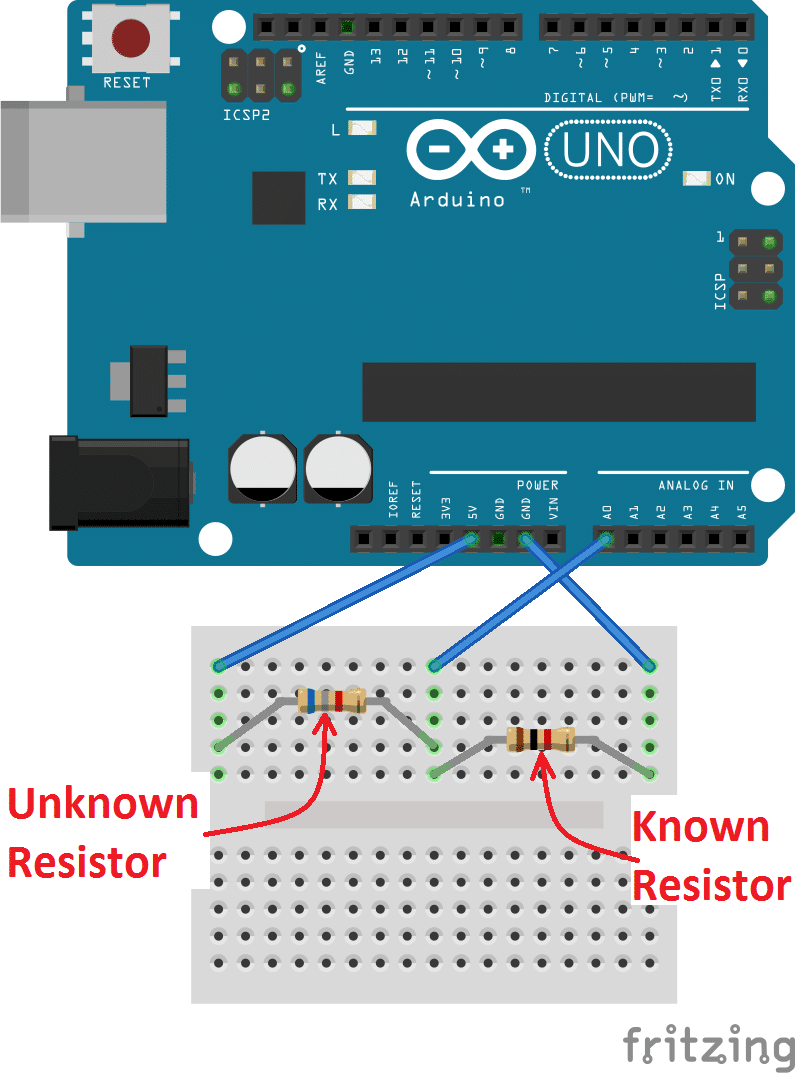
In the Arduino code we will share shortly, the 5th line will be where the value of the known resistor is entered. In our application, the value of the known resistor is 1K Ohm (1000 Ohm). Therefore, in our application, it will appear as float R1 = 1000;
The program will use the A0 analog pin to read the voltage between the known resistor and the unknown resistor. However, you can use another analog pin, just change the pin number on the 1st line and wire the circuit accordingly.
When you open the serial monitor, you will see resistance values printed once per second. There will be two values, R2 and Vout.
R2: The value of our unknown resistor
Vout: Voltage drop across your unknown resistor.
Accuracy Rate
In our project, the product we used as the unknown resistor is 200 ohms. Here are the results we obtained:
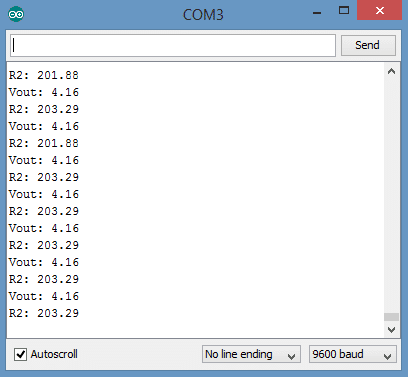
As seen, the values are quite accurate. There is only a 1.6% margin of error.
However, when we measured a 220K Ohm "unknown" resistor, here are the results we obtained:
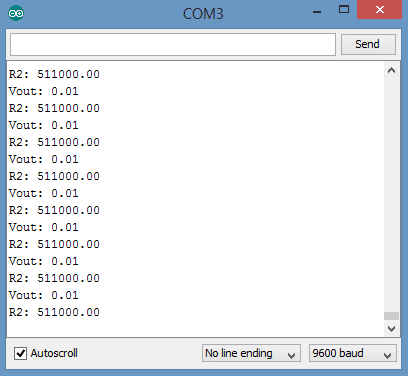
The error here is over 100%. Because we were still using a known resistor as 1K Ohm. If the value of the known resistor is much smaller or larger than the resistance of the unknown resistor, the accuracy of the ohmmeter will be poor.
The problem can be easily solved by using a known resistor that is closer to the unknown resistor. After changing the 1K Ohm known resistor to a 100K Ohm resistor, the accuracy of the measurements improved significantly. Remember to change the 5th line in the above code (floating R1 = 1000) to the value of your new known resistor. Here are the values we obtained with the same 220K Ohm "unknown" resistor and a 100K Ohm known resistor:
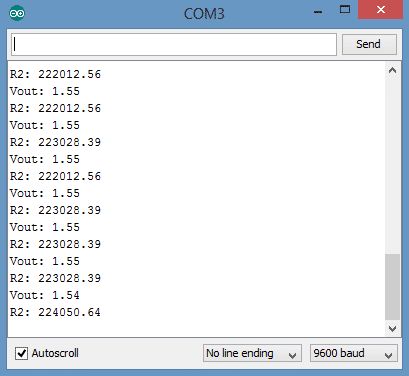
Here again, it's so easy to make measurements with a low error rate.
Arduino Codes
int analogPin = 0;
int raw = 0;
int Vin = 5;
float Vout = 0;
float R1 = 1000;
float R2 = 0;
float buffer = 0;
void setup()
{
Serial.begin(9600);
}
void loop()
{
raw = analogRead(analogPin);
if (raw)
{
buffer = raw * Vin;
Vout = (buffer) / 1024.0;
buffer = (Vin / Vout) - 1;
R2 = R1 * buffer;
Serial.print("Vout: ");
Serial.println(Vout);
Serial.print("R2: ");
Serial.println(R2);
delay(1000);
}
}
Blog Latest Additions

Differences Between Li-ion and Li-Po Batteries: Which Battery is Suitable for Which Project?
12.12.2025

MPU-9250: 9-Axis Acceleration Sensor - A Comprehensive Beginner's Guide
28.10.2025

What is ULN2003 ?
13.10.2025

What are Serial Converter Cards (RS232, RS485, TTL)
16.09.2025

What is Peltier and What is its Working Principle?
30.08.2025

Arduino UNO vs Nano vs Mega – Which Should I Choose?
23.07.2025
.png)