Setting Up Raspberry Pi
In this article, we will discuss the materials needed for using Raspberry Pi and how to set up Raspberry Pi.
Required Materials
Which Raspberry Pi?
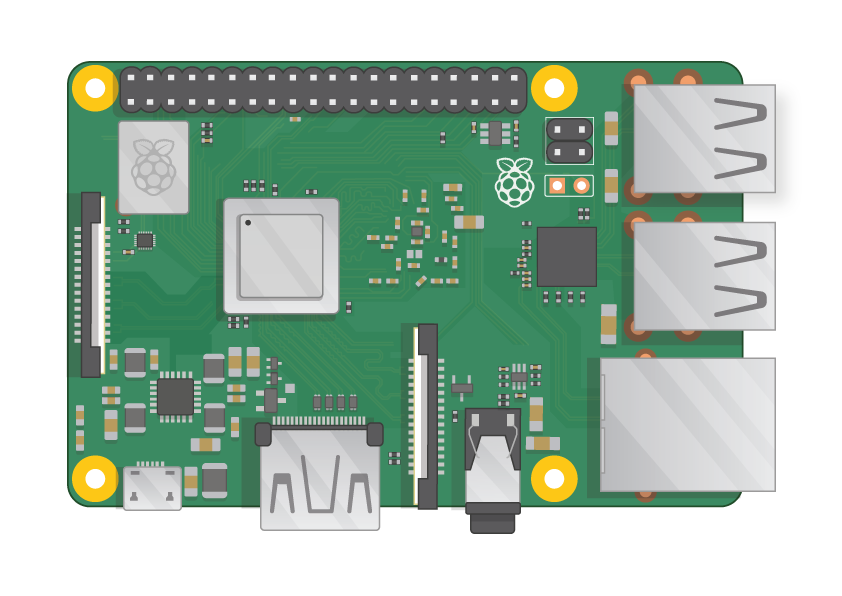
Raspberry Pi has several models, and the most commonly used one is Raspberry Pi 3 Model B+. Raspberry Pi 3 Model B+ is the newest, fastest, and easiest to use. Raspberry Pi Zero and Zero W are smaller and require less power, making them useful for portable projects like robots. Starting a project with Raspberry Pi 3 and transitioning to Pi Zero when a smaller Pi would be beneficial for a work prototype is often easier.
Power Source
To connect to power, Raspberry Pi has a micro USB port. You will need a power source that provides at least 2.5 amps. We recommend using the Original Raspberry Pi power adapter.
Micro SD Card
Raspberry Pi needs an SD card with at least 8 GB capacity to store all its files and the Raspbian operating system.
Keyboard and Mouse
You will need a USB keyboard and USB mouse to start using Raspberry Pi. After setting up your Pi, you can use a Bluetooth keyboard and mouse, but USB keyboard and mouse are required for setup.
TV or Computer Screen
You will need a screen and a cable to connect it to view the Raspbian desktop environment. The screen can be a TV or a computer monitor. If the screen has built-in speakers, Pi can use them to play audio.
HDMI
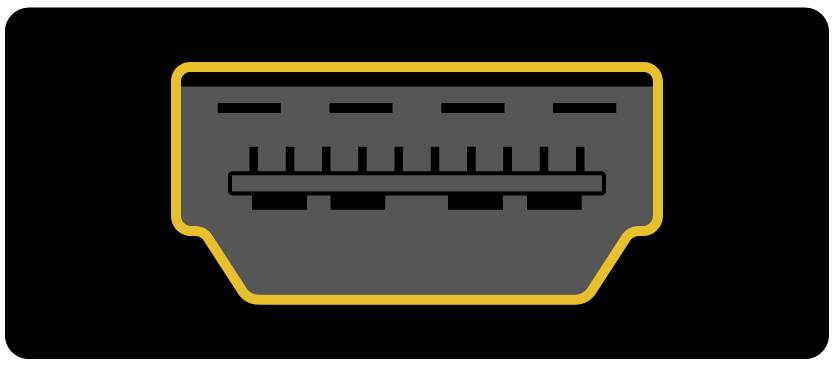 Raspberry Pi has an HDMI output port compatible with most modern TVs and computer monitors' HDMI ports. Additionally, most computer monitors may have DVI or VGA ports.
DVI
 If your screen has a DVI port, you can connect Pi using an HDMI-DVI converter cable.
VGA
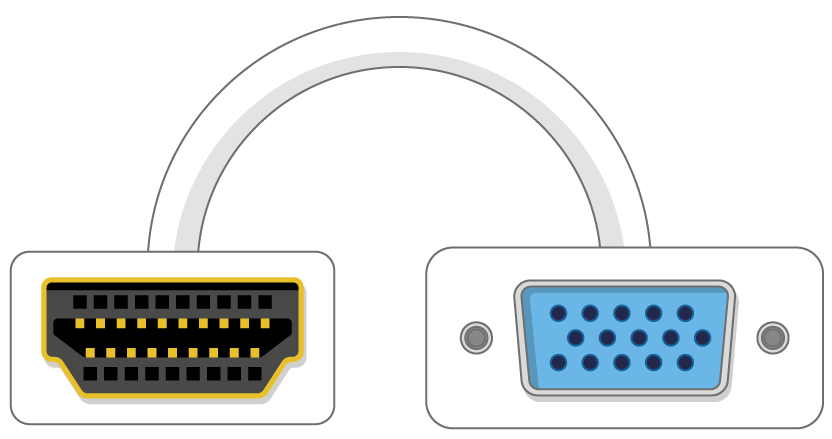
Some screens only have a VGA port. You can use an HDMI-VGA adapter to connect your Pi to such a screen.
Set Up Your SD Card
If you have an SD card without the Raspbian operating system on it or if you want to reset your Raspberry Pi, you can easily install Raspbian yourself. To do this, you will need a computer with an SD card slot - most laptops and desktop computers have one.
Installing Raspbian Operating System via NOOBS
Using the NOOBS software is the easiest way to install Raspbian on your SD card. Click here to download NOOBS.
You should see a box containing NOOBS files. Click on the box.
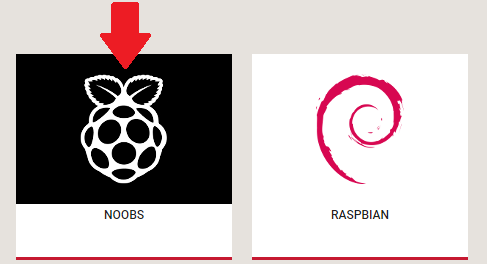
The simplest option is to download the zip archive of the files.
Format the SD Card
During formatting, anything stored on the SD card will be overwritten. If there are any files currently on the SD card where you want to install Raspbian, make sure to back them up first to avoid permanently losing them.
Visit the SD Association's website and download SD Formatter for Windows or Mac.
Insert your SD card into the SD card slot of your computer or laptop and note the drive letter it's assigned; e.g., F:/.
In SD Formatter, select the drive letter of your SD card and format the card.
Extract NOOBS from the zip archive
You will need to extract NOOBS from the zip archive you downloaded from the Raspberry Pi website. Locate the downloaded archive. Double-click on it to open the window and keep it open.
Copy the files
Open another window and navigate to the SD card. Select all files in the NOOBS folder and drag them to the SD card window to copy them. Once all files are copied, you can eject the SD card.
Connect Your Raspberry Pi
We can connect our components to the Pi. It's important to do this in the correct order to keep all your components safe.
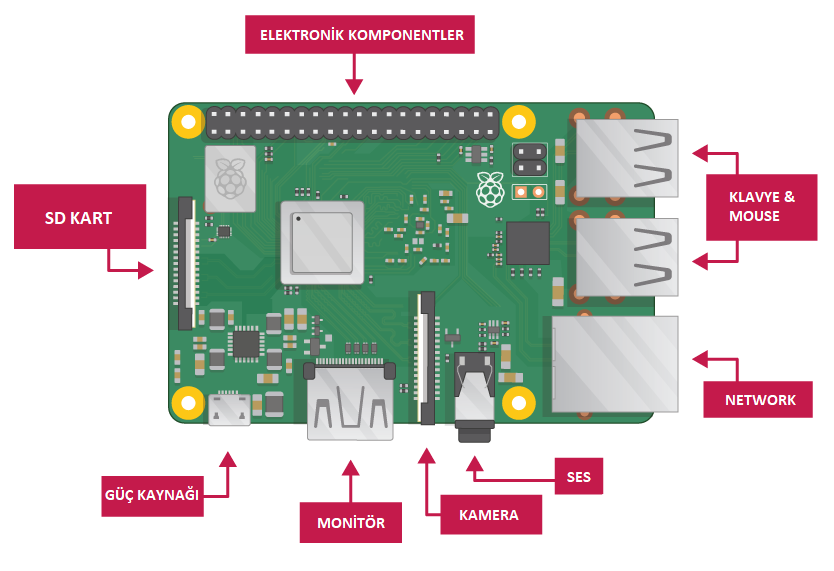
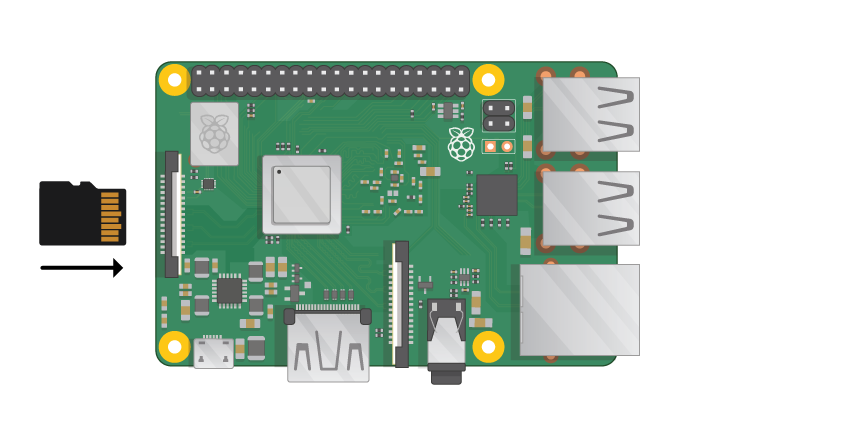
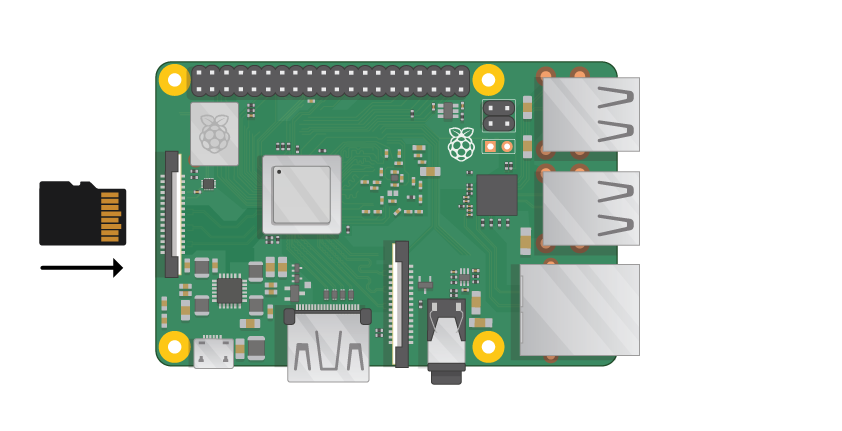
Insert the SD card with Raspbian installed (via NOOBS) into the micro SD card slot under your Pi.
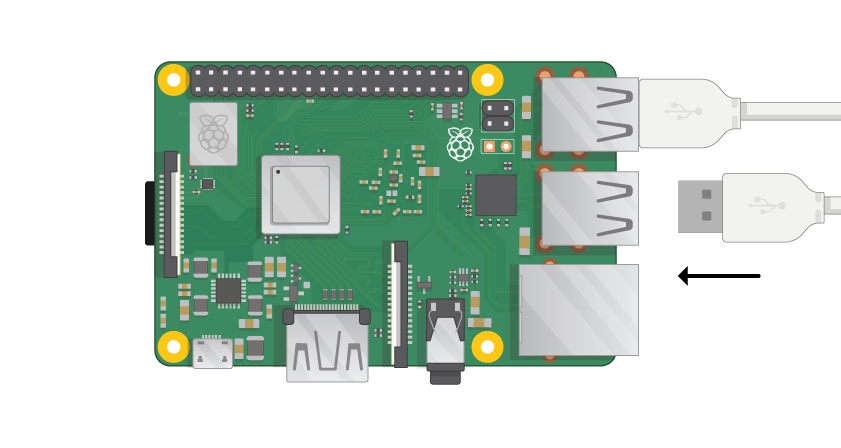
Use an HDMI cable to connect your screen to the HDMI port on your Raspberry Pi - use a converter if necessary. Make sure your screen is plugged in and turned on.
Note: Since Pi hasn't started working yet, you won't see anything on the screen.
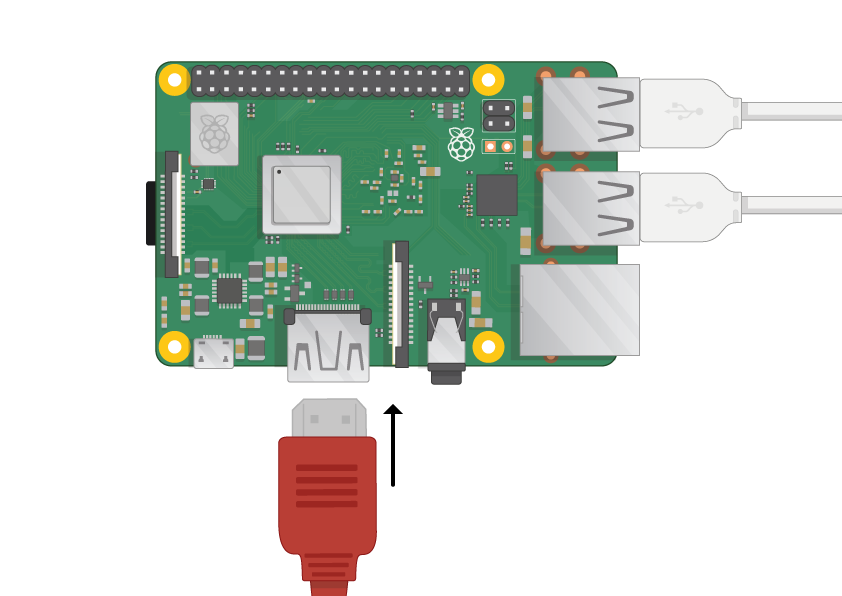
If you want to connect your Pi to the Internet via Ethernet, use an Ethernet cable to connect the Ethernet port on your Raspberry Pi to the Ethernet socket on your internet router. If you are using WiFi or do not want to connect to the Internet, you don't need to do this.
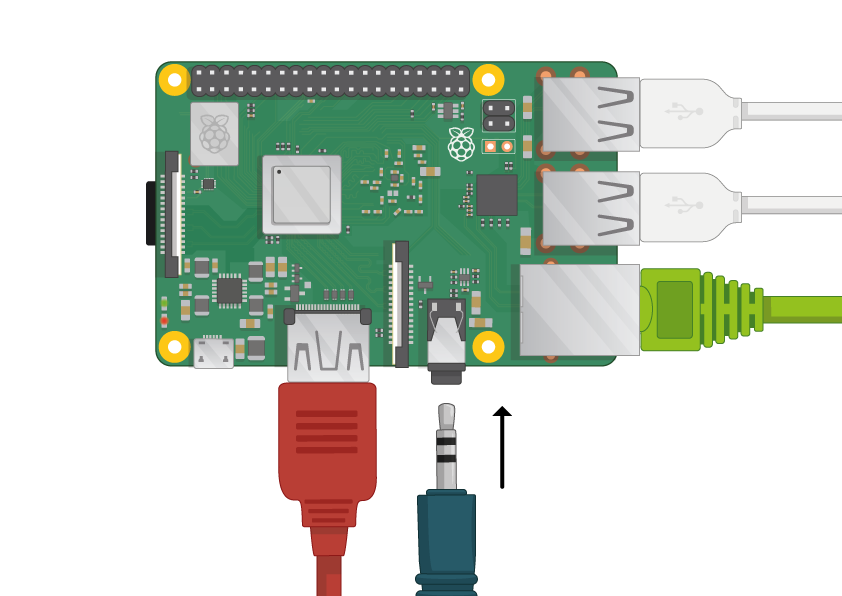
If your screen has speakers, the sound will come from your screen, or you can connect headphones or speakers to the audio jack if available.
Start Your Raspberry Pi
Raspberry Pi does not have a power button: it turns on when you plug it into the power. Plug in the micro USB power source and connect it to the power port of your Pi.
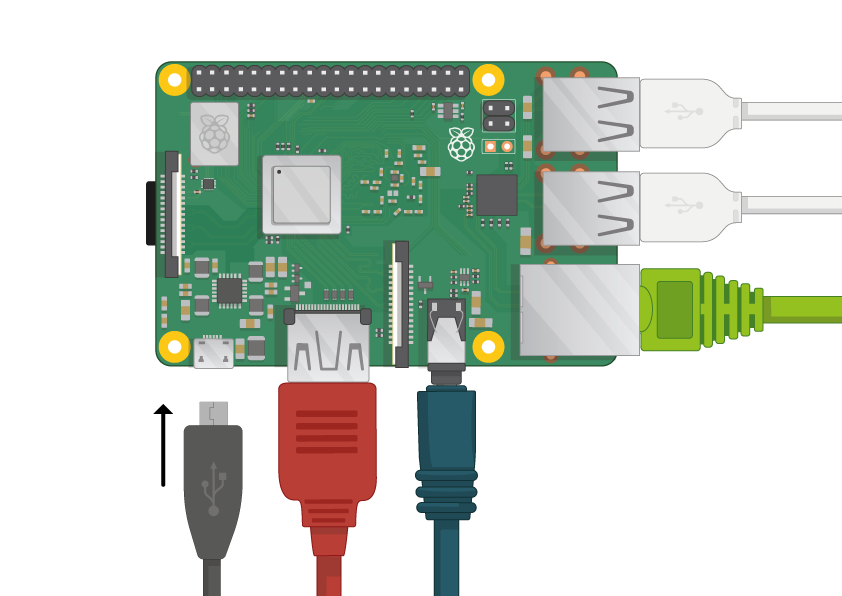
You should see a red LED light on the Raspberry Pi indicating that it is powered. During startup (also called booting), the raspberry will appear in the top left corner of your screen.

First Boot with NOOBS
If your Raspberry Pi comes with an SD card containing NOOBS for the first time, you will see the NOOBS installer. This software will guide you through installing the Raspbian operating system (OS).When the installer loads, it will offer you an option to select which operating system to install. Check the box for Raspbian and then click Install.

Click Yes in the warning dialog box and wait. The Raspbian installation process will take some time.
Click OK when Raspbian is installed. Your Raspberry Pi will reboot, and then Raspbian will open.
After a few seconds, the Raspbian desktop will appear.
Finish Setup
When you first boot up your Raspberry Pi, the Welcome to Raspberry Pi application opens and guides you through the initial setup.
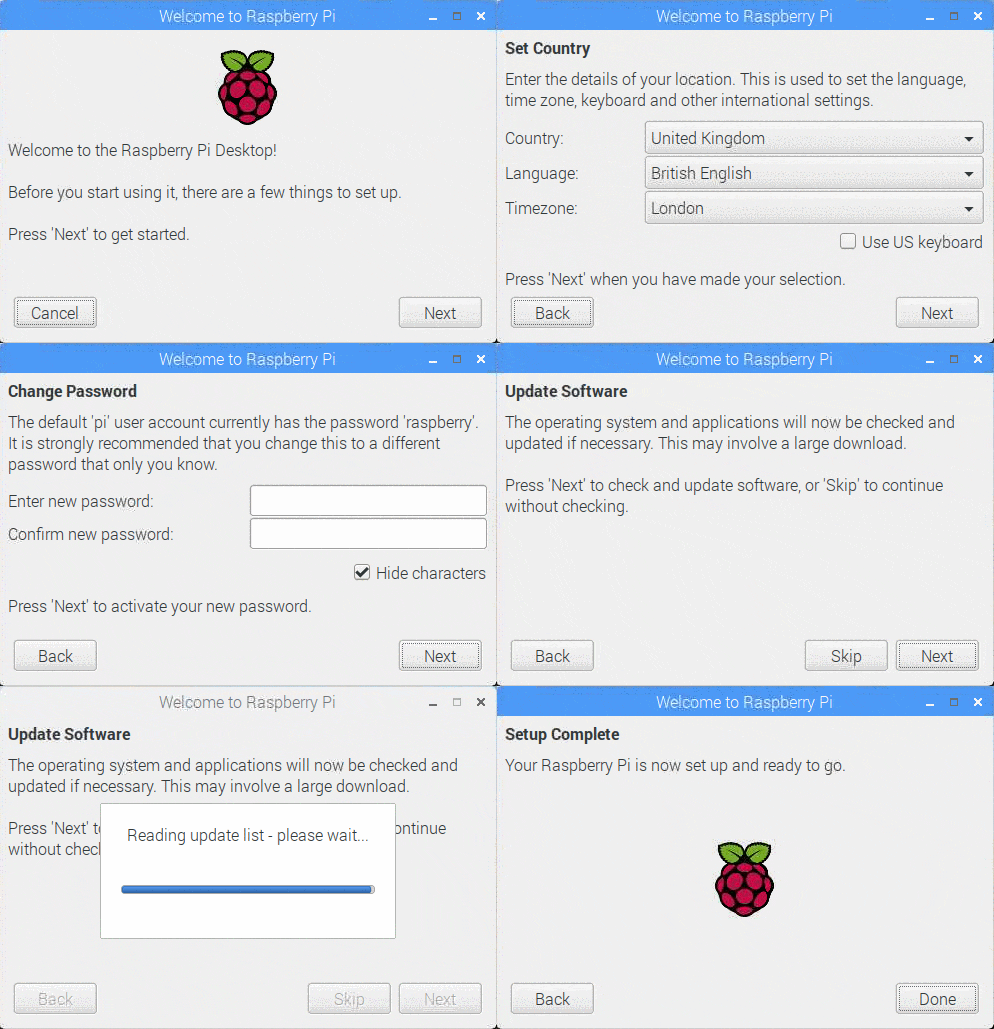
- Click Next to start the setup.
- Set your Country, Language, and Timezone, then click Next again.
- Enter a new password for your Raspberry Pi and click Next.
- Choose a name, enter the password, and click Next to connect to your WiFi network.
Note: If your Raspberry Pi model doesn't have wireless connection, you won't see this screen.
- Allow the wizard to check for and install updates in Raspbian by clicking Next (this process may take some time).
- Click Finish or Restart to complete the setup.
Note: If you need to complete just one update, you'll need to restart.
Blog Latest Additions

Differences Between Li-ion and Li-Po Batteries: Which Battery is Suitable for Which Project?
12.12.2025
MPU-9250: 9-Axis Acceleration Sensor - A Comprehensive Beginner's Guide
28.10.2025

What is ULN2003 ?
13.10.2025
What are Serial Converter Cards (RS232, RS485, TTL)
16.09.2025
What is Peltier and What is its Working Principle?
30.08.2025

Arduino UNO vs Nano vs Mega – Which Should I Choose?
23.07.2025
.png)